One of the cutest snowman craft projects you will ever see! Completely easy to make and adorable to look at all winter long.

Easy 3D Burlap Snowman Craft
Wall Hanging
It doesn't take long after Halloween for me to get into the holiday decorating mood. So basically as soon as November 1st hits I am ready for cinnamon scented pine cones, red bows and snowflakes. I usually decorate for winter first, then after Thanksgiving I pull out the Christmas decor.
In the spirit of our first snowfall this past week, my daughter and I made this easy burlap snowman craft. Most of my creative ideas come to me at night when I am trying to fall asleep , luckily I remembered this one when I woke up the next morning!

We have a rather large wall off of our kitchen that is not a focal wall, but is there. And bare. So this was the perfect place to hang this snowman. Here is how you make this cute creation :
What you need :
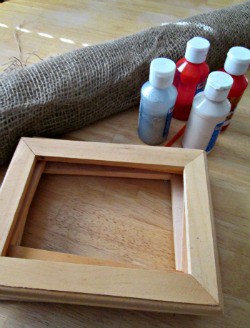
Burlap ( seriously cheap at some craft or thrift stores) Wood Picture Frames ( we were lucky to have found a bunch at a yard sale, unfinished for 25c each a few months back) Staple Gun (or glue, but this will take longer) White Paint / brush 2 Twigs a Sprig of pine or holly, whatever you can find for the hat embellishment Black fabric for the hat , buttons and face A button nose ( of course!) Hammer & 3 small finishing nails Snowflakes (optional, but they are $1 at Dollar Tree and make a cute addition!)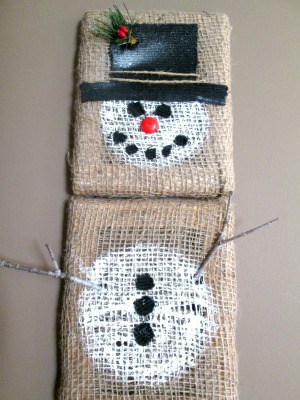
What to do :
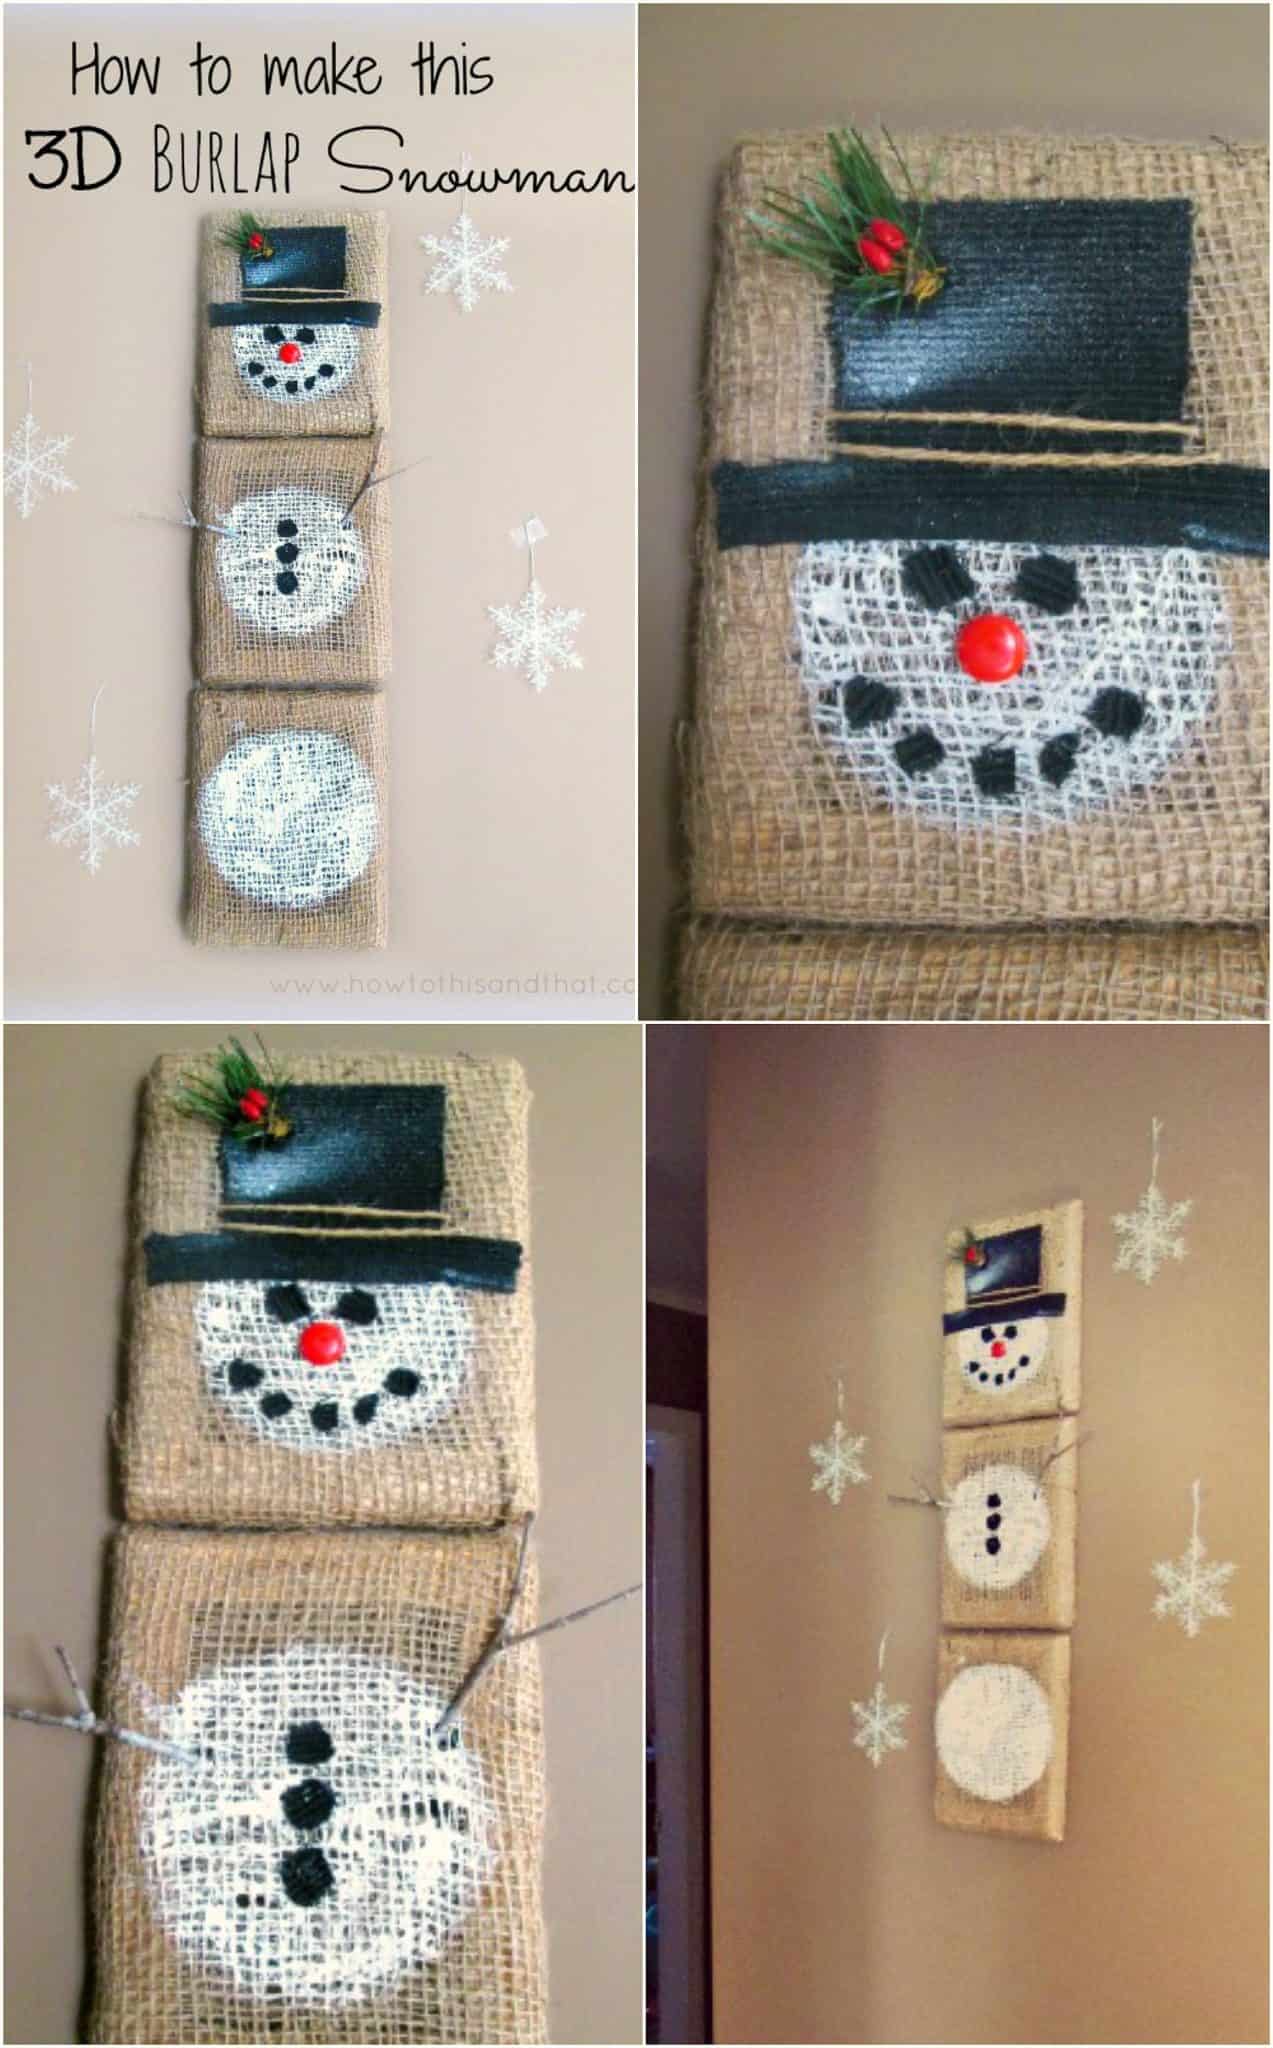
1. Cut your burlap to size, lay flat front side down on a hard surface, staple the edges on the back of the frame. Do this to all 3 frames
2. Use a cup or circular object (or, for those more talented than I, free hand it) to draw a circle on each frame, getting smaller as you go ( head, body, bottom)
3. Paint the circles white and let dry while you work on the next steps
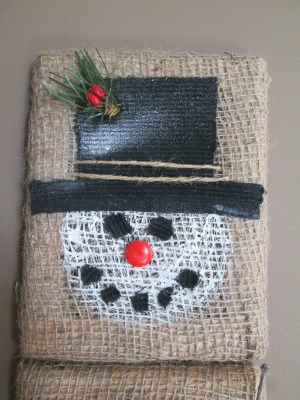
4. Cut a hat, eyes, mouth and buttons out of the black fabric
5. Glue some red berries onto a small sprig of pine for the hat embellishment. Be careful which berries you use, try to find hard ones that will not squish when you press down to glue them.
6. To add the arms, stick your twigs through the burlap, glue and glue flat to the sides of the frame
7. Glue the remaining elements into place
8. Let dry , hang with finishing nails
9. Show it off to everyone , because let's face it, he is pretty darn cute.
TIP * You can use spray snow to add a little extra winter to the hat or edge of the frames!
Let me know if you make him, I would love to see your pictures!
Here are some more fun Snowman Crafts and Decorations you can make 20 Snowman Decorations & Crafts
Related Posts:


Owner & Lead Recipe Developer for It's Simple! since 2015, where you will find our best Family Favorites & Keto Low Carb Dishes with Helpful Cooking Tips & Hints in each post. Many Thanks for Stopping By, Enjoy!
I hope you can direct me to instructions for making the yarn snowman I saw it advertise dor dyi it was made by usein fowm and another was using paper plates and another by just rollin yarn in to balls it as a little either twigs or wire. I am not sure just how to use printerest
thanks